INSTALLING BLINDS GUIDE
Its really easy to install your blinds.
Simply follow the instructions below and your blinds will be up in no time.
By installing blinds yourself, you can save up to 50%.
What you will need
1) Drill and drill bit (6mm recommended)
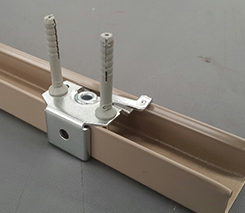
2) 6mm nail in anchors (supplied)
3) Screwdriver
4) Pencil
5) Screws and Brackets (supplied)
Installation Instructions
STEP 1: Select the mounting method you specified when ordering your blinds.
(The brackets represented below are only a representation of the brackets you may receive. Your actual brackets may vary slightly however the installation procedure remains the same)
Face mounting to the wall or window frame

Recess mounting to the ceiling or window lintel
STEP 2: Select the mounting method you specified when ordering your blinds.
(The brackets represented below are only a representation of the brackets you may receive. Your actual brackets may vary slightly however the installation procedure remains the same)
STEP 3: Drill pilot holes where you marked the screw holes. Insert plugs provided into the drilled holes. Use a screwdriver to attach the brackets to the wall or roof using the screws provided. Ensure the brackets are not positioned on top of the moving component parts as this will effect the operation of the blind.
STEP 4: After the first bracket is mounted, carefully position and attach the second bracket. Double check to be sure that it is level with the first bracket and that both are the correct distance apart.


STEP 5: Clip the blind underneath the brackets. make sure that the blind cord and tilt cord collar face towards you.
Well done! You have installed your new blinds

